1. Introduction to Hand-Gesture Recognition
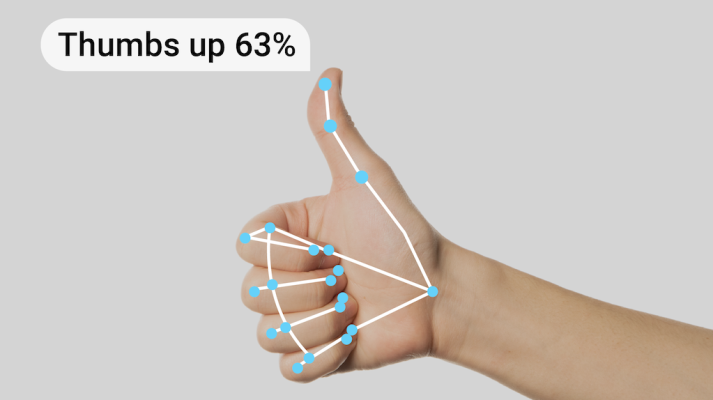
Hand gesture recognition is a subset of computer vision that focuses on recognizing meaningful human hand shapes or movements. It is widely used in interactive systems for games, virtual reality, sign language recognition, robotics, and more. With the rise of deep learning, hand-gesture recognition has become more precise and efficient.
2. About PyTorch
PyTorch is an open-source machine learning library for Python, based on Torch. It offers two high-level features: tensor computation (like NumPy) with strong GPU acceleration and deep neural networks built on a tape-based autograd system. PyTorch is favored for its simplicity, ease of use, dynamic computational graph and active community support.
3. Dataset Selection
For this tutorial, we will use the LeapGesture dataset, which contains 20000 frames of hand gestures, captured by Leap Motion device. It consists of 10 types of hand gestures, which makes it a suitable candidate for this task as it provides a diverse set of gestures and a large number of samples.
Let’s start coding. We assume that you have already installed PyTorch. If not, please visit the official website for installation instructions.
Import necessary packages
import os
import numpy as np
from torchvision import transforms
from torch.utils.data import Dataset, DataLoader
import torch
import torch.nn as nn
import torch.optim as optim
4. Data Preprocessing
Our data preprocessing will involve loading the data, applying some transformations for data augmentation, and splitting the data into training and testing sets.
Load the data
class LeapGestRecog(Dataset):
    def __init__(self, root, transform=None):
        self.root = root
        self.transform = transform
        self.x = []
        self.y = []

        folders = os.listdir(root)
        for folder in folders:
            for dirpath, dirnames, filenames in os.walk(os.path.join(root, folder)):
                for filename in filenames:
                    self.x.append(os.path.join(dirpath, filename))
                    self.y.append(folder)
        self.len = len(self.x)

    def __len__(self):
        return self.len

    def __getitem__(self, index):
        img = Image.open(self.x[index]).convert('L')
        y = self.y[index]
        if self.transform:
            img = self.transform(img)
        return img, y

root = './data/leapGestRecog/'
transform = transforms.Compose([transforms.Resize((128, 128)), transforms.ToTensor()])
dataset = LeapGestRecog(root, transform=transform)
Splitting data into train and test set
train_size = int(0.8 * len(dataset))
test_size = len(dataset) - train_size
train_dataset, test_dataset = torch.utils.data.random_split(dataset, [train_size, test_size])
5. Building the Model
Let’s build a Convolutional Neural Network (CNN) model for this task. We’ll use three convolutional layers, followed by two fully connected layers.
class Net(nn.Module):
    def __init__(self):
        super(Net, self).__init__()
        self.conv1 = nn.Conv2d(1, 32, kernel_size=5)
        self.conv2 = nn.Conv2d(32, 64, kernel_size=5)
        self.conv3 = nn.Conv2d(64, 128, kernel_size=5)
        self.fc1 = nn.Linear(128*12*12, 128)
        self.fc2 = nn.Linear(128, 10)

    def forward(self, x):
        x = F.relu(self.conv1(x))
        x = F.max_pool2d(x, 2)
        x = F.relu(self.conv2(x))
        x = F.max_pool2d(x, 2)
        x = F.relu(self.conv3(x))
        x = x.view(x.size(0), -1)  # Flatten layer
        x = F.relu(self.fc1(x))
        x = self.fc2(x)
        return F.log_softmax(x, dim=1)

model = Net()
6. Training the Model
We will use the Adam optimizer and the CrossEntropy loss function. We’ll train the model for 10 epochs with a batch size of 64.
train_loader = DataLoader(train_dataset, batch_size=64, shuffle=True)
test_loader = DataLoader(test_dataset, batch_size=64, shuffle=True)

device = torch.device('cuda' if torch.cuda.is_available() else 'cpu')
model.to(device)

optimizer = optim.Adam(model.parameters(), lr=0.001)
loss_fn = nn.CrossEntropyLoss()

def train(epoch):
    model.train()
    for batch_idx, (data, target) in enumerate(train_loader):
        data, target = data.to(device), target.to(device)
        optimizer.zero_grad()
        output = model(data)
        loss = loss_fn(output, target)
        loss.backward()
        optimizer.step()
        print('Train Epoch: {} [{}/{} ({:.0f}%)]\tLoss: {:.6f}'.format(
            epoch, batch_idx * len(data), len(train_loader.dataset),
            100. * batch_idx / len(train_loader), loss.item()))

for epoch in range(1, 11):
    train(epoch)
7. Testing the Model
We can evaluate the model’s performance on the unseen test data.
def test():
    model.eval()
    test_loss = 0
    correct = 0
    with torch.no_grad():
        for data, target in test_loader:
            data, target = data.to(device), target.to(device)
            output = model(data)
            test_loss += loss_fn(output, target).item()
            pred = output.data.max(1, keepdim=True)[1]
            correct += pred.eq(target.data.view_as(pred)).sum()
    test_loss /= len(test_loader.dataset)
    print('\nTest set: Avg. loss: {:.4f}, Accuracy: {}/{} ({:.0f}%)\n'.format(
        test_loss, correct, len(test_loader.dataset),
        100. * correct / len(test_loader.dataset)))

test()
8. Model Improvement Tips
Here are few tips to improve your model performance:
- More Data: More data can help the model generalize better.
- Data Augmentation: Applying different techniques like rotation, flipping can help model to be more robust.
- More Complex Model: If your model is underfitting, try to increase the complexity of the model.
- Regularization: If your model is overfitting, try using regularization techniques like dropout or L1, L2 regularization.
- Hyperparameter Tuning: Tune parameters like learning rate, batch size, number of epochs, etc.
9. Summary
This tutorial has shown you how to develop a hand gesture recognition model using PyTorch. It’s just a start and the accuracy can be improved with more complex architectures, data augmentation techniques and by tuning hyperparameters.
We hope this tutorial helped you understand the process of hand-gesture recognition using PyTorch, and we encourage you to experiment with the code and the model structure to see how the performance can be improved!

